Setting Up Your LinkedIn Profile
With over 467 million users, and an average of two new members signing up each second, it’s no wonder LinkedIn is the largest professional networking site in existence. The site is used for exchanging knowledge, ideas and employment opportunities with other professionals and helps you maintain contact with millions of users worldwide. In recent years it has become one of the leading tools for helping users expand their networks as well as finding jobs in their fields.
Step 1: Go to https://ie.linkedin.com/
Step 2: Look for “Join Now” form and fill out your details, click “Join Now” once the form is completed.

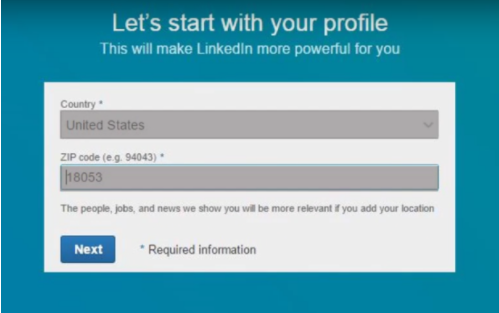
Step 3: You will then be prompted to fill out your country and zip code and click “Next”.
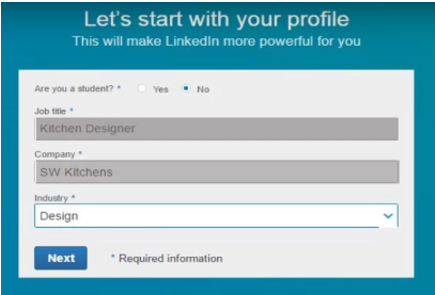
Step 4: You will then be asked to specify whether or not you are a student, your job title, company and the appropriate industry. When you’ve completed these details, click “Next”.
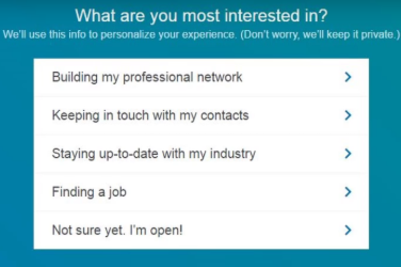
Step 5: The next window will have you choose why you are most interested in joining LinkedIn. This step is designed to help personalise your LinkedIn to coincide with your needs and expectations of joining the site.
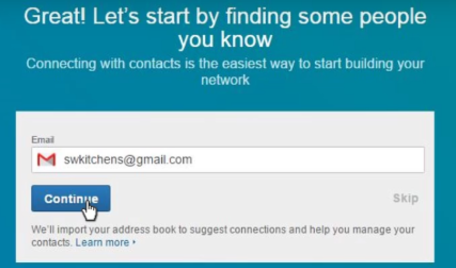
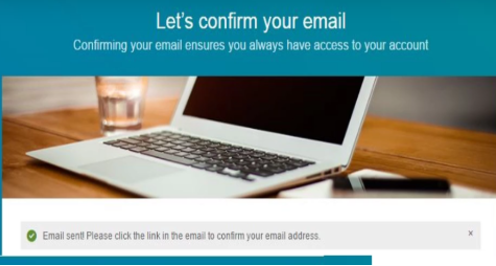
Once you select one of the options it will automatically bring you to a window to confirm your email address.
Step 6: Follow the instructions listed to correctly confirm your email address.
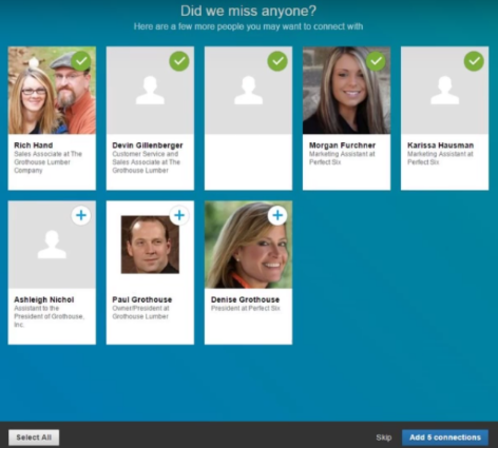
Step 7: Once you have confirmed your email, LinkedIn will find which of your email connections are already on the LinkedIn network. You can choose who you want/don’t want to connect with. Once you’ve finished selecting your contacts, click “Continue”.
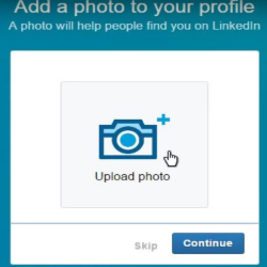
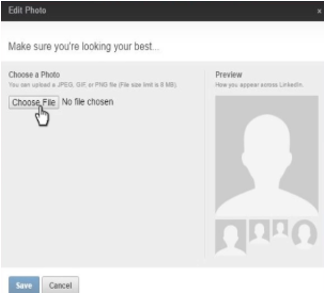
Step 8: You will then be shown a window where you will be asked to choose a profile photo. It is important to spend some time on this step as you will want to select an appropriate photograph. You are not recommended to use group photos on your LinkedIn profile. It is important to remember that you are connecting with other professionals and will want them to take you seriously, for this reason, a simple, professional head-shot is the best option.
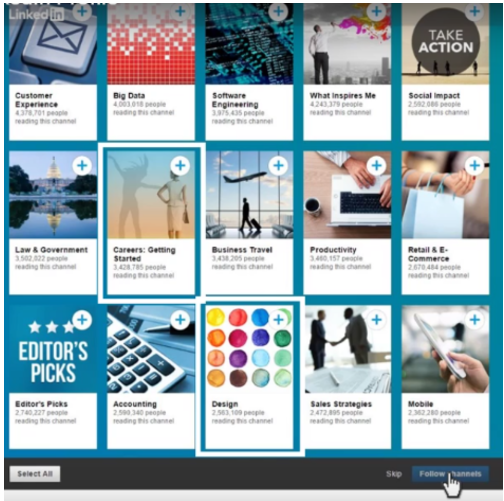
Step 9: Next LinkedIn will prompt you to begin choosing topics related to your industry. Related articles and posts of topics you choose will then begin to appear on your newsfeed, where you can view and interact with them.
Choose topics that you are interested in or ones that apply to your industry. When you are finished choosing, click “Follow Channels”.
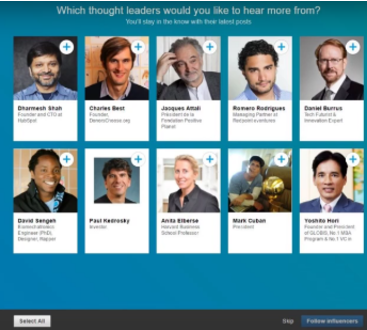
Step 10: LinkedIn will then ask you which leaders you would like to hear more from. You have the option to choose 1/5/zero. These leaders will then begin to appear on your timeline and you can read posts/quotes they share.
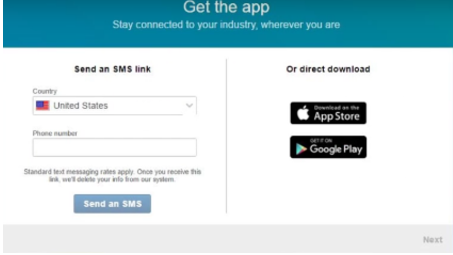
Step 11: Next you may choose to download the app on your smartphone so you can stay connected wherever you are. If you choose not to, click “Next”. You can always download the app at a later stage.
Step 12: Your LinkedIn profile is now beginning to come together and should look something similar to the example below.
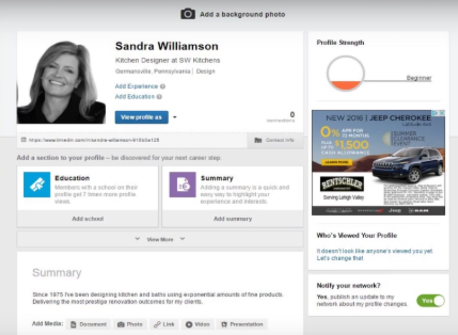
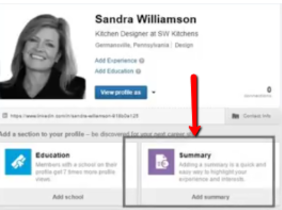
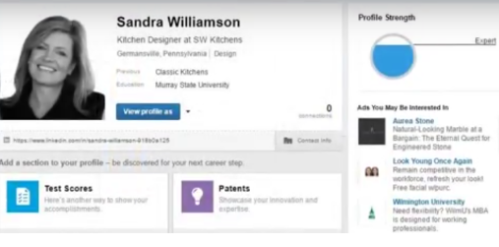
Step 13: The next step is to try and increase your profile strength from “Beginner” to “Expert”. On the profile tab in your LinkedIn account, you’ll see different coloured boxes below your profile photo. Inputting information into these boxes will help increase your profile strength. A good starting point is the “Education” section of the profile.
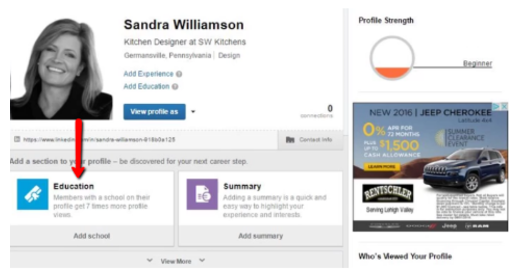
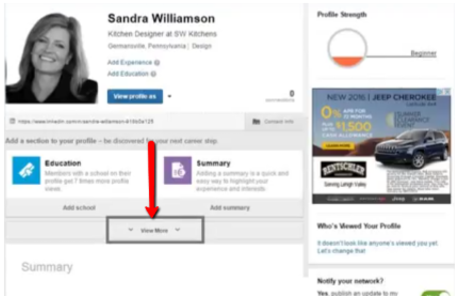
If you click on the education box you will be directed to the education section of your profile, where you can input your past education information. Make sure you “Save” your changes. You can always click the “View More” option to edit different sections of your profile.

Step 14: Next you should click on the “View More” option and edit the skills section of your profile.
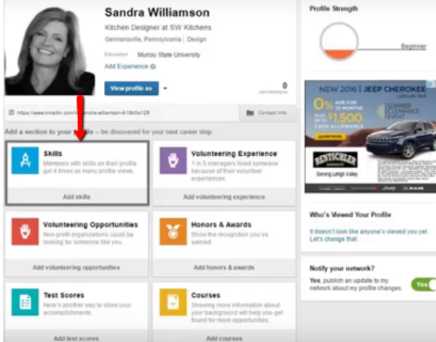
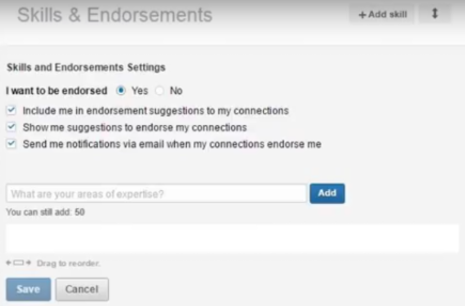
The first option will have you choose whether or not you would like your skills to be endorsed. You should choose “Yes”. Being endorsed for your skills means your connections can give you points towards certain skills. Begin choosing skills that apply to your industry and job so that you can receive recognition from your connections. Having many endorsements for skills can attract specific viewers to your profile.
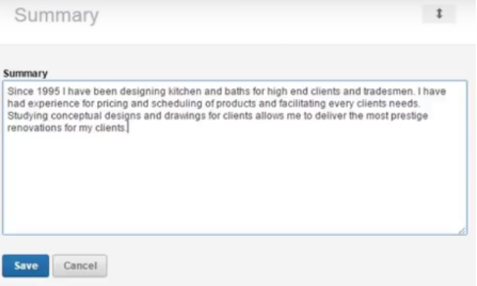
Step 15: Next focus on creating your personal summary. This section is very important for your profile. Click the “Summary” box and you will be navigated to the personal summary section of your profile. Here you will summarise your skills, experiences and achievements into one condensed paragraph. It is important to use relevant keywords so that it’s easier for others in your industry to find you.
Step 16: As you continue to update your profile, the boxes under your profile photo will continue to change based on what you have left to fill out. As you carry on filling out information, your profile strength will continue to grow.
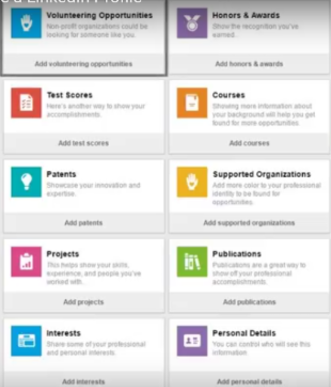
Keep clicking the “View More” option to see what your profile is missing and what you can fill out to increase your profile strength to “Expert”.
Remember when your LinkedIn profile is complete, always proof-read and double check for mistakes.
Recent Comments