How to Start a YouTube Channel
1) Sign Into Your Google Account.
Before you can start creating a YouTube account, you must sign in to your Google account. (YouTube is owned by Google.) Sign In To YouTube
2) Click on My Channel.
After signing in to your YouTube account, click on the drop down arrow next to your avatar in the top right corner. This is the same place where the, “Sign In” button usually is. After you click on the drop down arrow, a new set of options will appear. The first thing you want to do here is to click on, “My Channel”.
3) Decide the Name.
This is one of the most important steps when it comes to creating a YouTube channel. Deciding your channel name! It is recommended that you use your company’s name, by clicking on the “To use a business or other name, click here” button. Choose Your Channel Name.
After deciding on a name, fill in the required fields below and be sure to read over the page terms before selecting, “I Agree”. Once you finish filling in the information required, click on, “Done”.
4) Take a Quick Tour.
Once you finish the naming process, you are taken to your channel page. You may also see an option at the top right of your page that invites you to take a tour of your new channel. It’s quick and it helps you get familiar with different options for editing your channel.
5) Edit YouTube Account Settings.
- In order to edit your account settings, you must go back to the drop down menu by clicking on the downwards arrow and then select, “YouTube Settings”.
- Edit Your YouTube Account Settings
Creating a Custom YouTube URL
It’s always great to have a custom YouTube URL instead of a default one. For example, your YouTube channel url may be “www.YouTube.com/user/shdohfo8h0hd0dn0–9” etc. Instead, you can have a custom url for your channel that is branded. It can be “www.YouTube.com/user/JeansGlitterGlasses”
This can be of great help when it comes to promoting your channel. It is something that others can remember more easily, you can include it on business cards, t-shirts, or other items because it is short and simple instead of one long random url.
- To create a custom URL for your YouTube channel, click on the, “Advanced” button.
- You will then be taken to the channel setting page. Click on the, “create custom url” button on the right of the default url.
- Now, you have the choice of creating a custom URL. Remember, these are the words that come after “User/” in the URL of “www.YouTube.com/user/YourURL “. Pick wisely!
- After deciding on a URL, click on create channel url. You now have your own custom channel url.

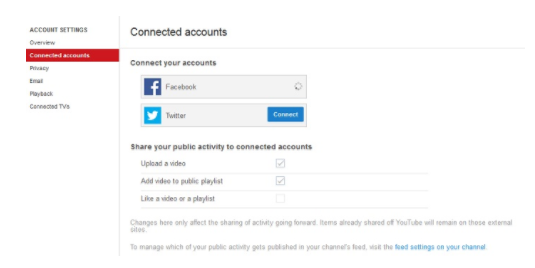
Connecting Your Account to Social Media.
- If you want to connect your YouTube channel to your social media accounts, click on “connected accounts’’ which is under the account settings menu on the left side of your screen.
- You can connect your YouTube channel to your Facebook and Twitter profiles. This is used to create statuses on your social media accounts every time you upload a video, like a video or edit your playlist. Be sure to click save once you’re finished!
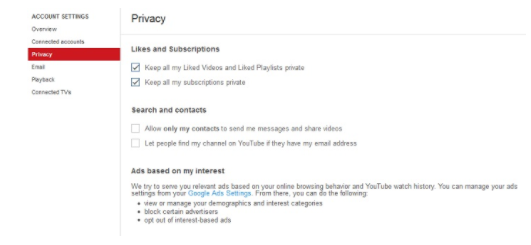
Edit Your Privacy Settings.
- In order to edit your account privacy settings, just click on the Privacy button under the connect accounts button on your account settings page.
- On this page, you can make certain actions private. This includes options like your subscriptions or liked videos and playlists. You can even edit settings regarding how people can contact you on YouTube.
Email Notification Settings.
- After editing your channel privacy settings, feel free to click the Email button under Privacy on your account settings menu.
- On this page, you can select how many times you want to receive notifications from YouTube through email. These notifications can be for subscriptions, newsletters, channel analytics, and other information. So pick and choose what you would like to be emailed about. You can even decide how often you prefer to be emailed.

Recent Comments